How to Start Streaming on Twitch: A Beginner’s Guide
*We may earn a commission for purchases made using our links. Please see our disclosure to learn more.
How to Start Streaming on Twitch: A Beginner’s Guide
I remember when I first thought about streaming on Twitch. It seemed like a fun way to share my love for gaming and connect with others who feel the same way. To start streaming on Twitch, all you need is a solid internet connection, a computer or console, and a clear idea of what you want to share with your audience. It may sound simple, but there’s a lot to think about to make your stream stand out.

Setting up your Twitch account is the next step. It’s not just about setting up a profile; it’s about understanding what makes a stream interesting and enjoyable. You’ll need to decide on the right software to use and configure your settings to get the best quality. I found it helpful to experiment and see what works best for the content I love creating.
As you get everything set up, don’t forget the importance of engaging with your audience. Building a community around your channel can make streaming a much more rewarding experience. Interacting with viewers through chat or using Twitch emotes can create a lively, inviting atmosphere. Starting my journey on Twitch wasn’t just about playing games; it was about making connections and sharing excitement with others.
Setting Up Your Twitch Account

Setting up your Twitch account involves selecting a unique username, personalizing your profile, and knowing the rules of the platform. Each step ensures a successful start on Twitch.
Choosing a Username
Picking the right username is crucial for identity and branding. I recommend keeping it simple and memorable. Look for a name that resonates with the content you plan to stream. You want it to be easy to spell and search for viewers.
Avoid using special characters, as they can make it harder for others to find you. If your preferred name is taken, try adding underscores or numbers at the end. Whatever choice you make, think about how it might sound if said aloud. Consistency is key, so if possible, use the same name across all social media platforms.
Setting Up Your Profile
Your profile is your introduction to potential followers. Start with a profile picture that reflects you or your brand. This could be a logo or a photo you feel represents your online persona. Next, focus on the bio section. Write a short description that tells viewers what your stream is about and why they should tune in.
You can utilize panels to organize information, such as your schedule, social links, and donation information. Make sure your profile is easy to navigate. Engaging visuals or themes can help make your profile stand out. Update your content regularly to maintain relevance and keep your audience informed.
Understanding Twitch Guidelines
Understanding Twitch’s rules is essential to keep your account in good standing. Twitch has detailed community guidelines that cover what’s allowed on the platform. These include rules on content, behavior, and moderation standards. I advise going through these guidelines thoroughly.
Some key points include respecting intellectual property and avoiding hate speech or harassment. Twitch also has policies on music and copyright, so ensure the music you play is licensed. Missteps can result in your content getting muted or worse, a suspension. Being informed helps you maintain a positive and safe streaming environment for yourself and your audience.
Creating a Streaming Setup

To stream on Twitch successfully, it is crucial to have the right equipment, suitable software, and a reliable internet connection. Each plays a significant role in ensuring a smooth and professional streaming experience.
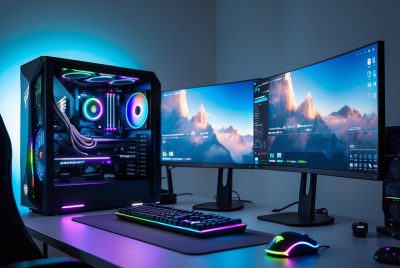
Essential Equipment for How to Start Streaming on Twitch
In getting started, a good quality microphone and webcam are necessary. Audio is often more important than video, so a USB microphone like the Blue Yeti can make a big difference. For video, a webcam with at least 1080p resolution is recommended for clear visuals.
A gaming PC or console is essential. A PC should have at least 8GB of RAM and a capable GPU, like the NVIDIA GTX 1660, for smooth performance. I also recommend having lighting equipment like ring lights to improve video quality, especially when streaming in dimly lit rooms.
Software Requirements
Broadcasting software is key to managing and displaying content. OBS Studio is widely used because it’s free and open-source. It’s important to set it up properly by configuring scenes and sources to capture your game, webcam, and overlays.
The Twitch app is also great for beginners due to its user-friendly interface. It allows direct streaming to Twitch without the need for complex setup. Getting familiar with software can smooth out the stream and enhance viewer experience.
Internet Connectivity Considerations
A strong internet connection is vital. I advise having at least a 10 Mbps upload speed for a stable stream. Remember, wired connections are more reliable than Wi-Fi for minimizing lag and interference.
Check if your internet package meets Twitch’s requirements before going live to avoid disruptions. Regularly testing your speed with tools like Speedtest can ensure you’re maintaining the needed performance for streaming.
Consider investing in a high-quality router to improve connectivity, especially if sharing the network with others.
How to Start Streaming on Twitch: Designing Your Stream

I’m going to walk you through making your Twitch stream look great. You’ll want to pick content that matches your interests, design appealing graphics, and make sure your camera setup and lighting are just right.
Choosing Your Content
The first step is picking what you want to share. Think about what you’re passionate about. This could be anything from gaming and art to music or cooking. It’s important to enjoy what you’re showing.
I also consider my audience. What do they like to watch? It helps to check out popular streams in your category. This way, I know what works and what might attract more viewers.
Creating Graphics and Overlays
Next, I focus on graphics and overlays. These are the visuals people see when they tune in. They include things like my logo, banners, and alerts.
I like to keep my design consistent. This means using the same colors and fonts throughout. Tools like Canva or Photoshop can help me create professional-looking graphics. An appealing layout can make a big difference to how my stream looks.
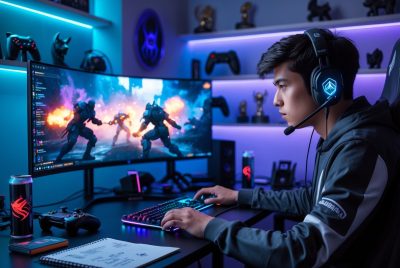
Setting the Scene with Camera and Lighting
A good camera setup is crucial. I always make sure my camera is steady and points at me comfortably. Trying various angles can help find the best shot.
Lighting is another key part. I use natural light or a good desk lamp to avoid shadows. Ring lights or LED panels can be great too. Good lighting makes me and my space look welcoming and clear to my audience.
How to Start Streaming on Twitch: Building an Audience

To build an audience on Twitch, I focus on promoting my channel effectively, engaging with viewers, and networking with other streamers. Each area requires specific strategies and consistent effort to grow a loyal community around my content.
Promoting Your Channel
Promotion is key to getting noticed on Twitch. I make use of social media platforms like Twitter, Instagram, and YouTube to share highlights and updates about my streams. This helps in reaching more people who may be interested in the content I create.
I also participate in relevant online communities and forums. Getting involved can connect me with like-minded individuals who might be interested in my streams. It’s important to provide value and not spam these channels with self-promotion.
Using descriptive titles and custom thumbnails helps attract viewers. When I create titles, I ensure they are engaging and accurately reflect what my stream is about. This makes it easier for potential viewers to find and click on my content.
Engaging Viewers
Engagement is critical in building a loyal audience. During streams, I interact with viewers by responding to chat messages and asking them questions. This creates a friendly atmosphere where viewers feel welcome and part of the community.
I use polls and voting to involve viewers in decision-making during the stream. This not only engages them but also makes them feel valued and inclined to return. Regularly giving shoutouts to active participants in the stream can also create a sense of recognition and appreciation.
Consistency in streaming schedules helps viewers know when to tune in. I aim to be regular with my stream timings so that my audience can plan to join without any guesswork.
Networking with Other Streamers
Networking with fellow streamers opens opportunities for collaboration and growth. I engage with other creators by participating in their streams and providing thoughtful comments. Supporting others can lead to reciprocation, expanding my network.
Collaboration streams or events with other streamers introduce me to their audience, which can boost my visibility. I also join streamer-focused groups on Discord or Reddit to connect and share experiences.
Building genuine relationships with other streamers is vital. By being part of a community, I can learn new techniques and strategies to enhance my content and encourage shared growth in audience reach.
How to Start Streaming on Twitch: Going Live

When it’s time to go live on Twitch, there are several important steps to ensure a smooth experience. This includes conducting a test stream, managing your dashboard, and engaging with viewers in the chat.
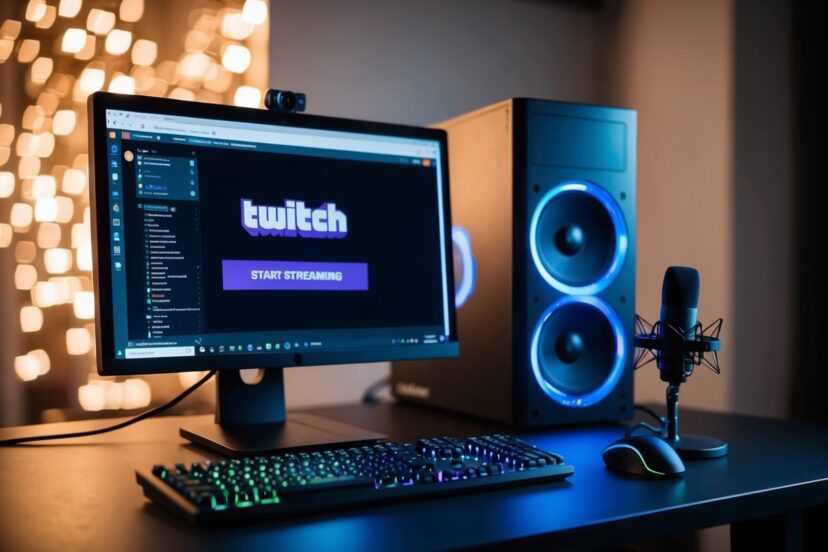
Conducting a Test Stream
I always start with a test stream before going live. This is important to check audio and video quality. In Twitch Studio or OBS, I run a private stream to see how everything looks. Checking the audio settings ensures sound is clear and balanced. This includes game sound, microphone input, and any alerts. I adjust lighting and camera angles during this test phase. A test stream might seem like an extra step, but it’s crucial. It helps prevent technical glitches when I’m live with my audience.
Managing Your Stream
During the live stream, I pay attention to the dashboard. This is where I monitor stream health and viewer stats. Key metrics like viewer count, chat activity, and performance indicators are right there. I keep an eye on stream stability. If there’s an issue, I’m ready to adjust settings on the fly. I make sure to use stream alerts and overlays, as they enhance viewer engagement. Configuring these ahead of time is smart. It keeps everything running smoothly during the broadcast.
Interacting with the Chat
Engaging with the chat is essential. I greet new viewers and acknowledge messages. This makes the stream interactive and lively. It’s important to set chat rules and use moderation tools. These keep interactions positive and friendly. I also love asking questions to the audience. It gets the chat moving and creates a sense of community. Sometimes, I use bots to manage repetitive tasks. This includes welcoming newcomers or filtering inappropriate messages. Keeping the chat engaged boosts viewer retention. It transforms my stream from a broadcast into a real conversation.
Frequently Asked Questions
Starting to stream on Twitch involves understanding the right equipment, setting it up on different devices, and knowing the costs. I will discuss each of these topics.
1. What equipment is required to start streaming on Twitch?
To begin streaming, you need a computer or console, a stable internet connection, and a microphone. A camera is optional but recommended for a more personal connection with viewers. For console streaming, a capture card may be necessary.
2. How can I set up Twitch streaming on my PC?
Download streaming software like OBS Studio. Create an account on Twitch, and link it to your streaming software. Set up your scenes and sources, then start broadcasting once everything is configured.
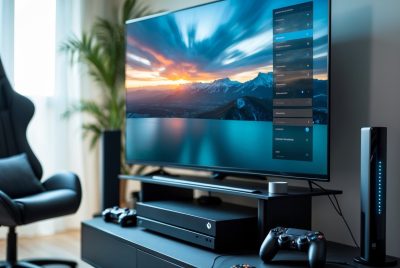
3. What steps are involved in streaming on Twitch from a PS5?
On a PS5, install the Twitch app. Log in to your account and select the game you want to stream. Press the Create button, select Broadcast, and follow the prompts to go live on Twitch.
4. Can you explain how to stream from a mobile device to Twitch?
Download the Twitch app on your mobile device. Open the app and log in. Tap on the camera icon to start broadcasting. Choose if you want to stream games or IRL content. Follow the setup prompts, and you’re ready to stream.
5. How much does it cost to begin streaming on Twitch professionally?
Starting professionally can vary in cost. Basic setups might cost a few hundred dollars, including a good microphone and webcam. More professional setups, with advanced audio and video equipment, can be more expensive. Investing in quality equipment as you grow is advisable.